I thought about doing this as a New Year sort of thing, but probably have more time to tackle this now. So here’s a ‘Year in Review’ of the Tool Tips. Where I’m at with these currently. What’s working, what’s not, what’s fallen by the way side, and what’s new. If you haven’t read the Tool Tips articles before, you can find them in the link here: https://doubledowndice.wordpress.com/category/tool-tips/
Full Disclaimer: I’m a hobbyist, and these are the things I’ve found that have worked for me. Mostly through lots of trial and error. I also have no ties to any of the vendors, and the links do not net me any kickback. Strictly for informational use, and opinions are largely my own.
Priming
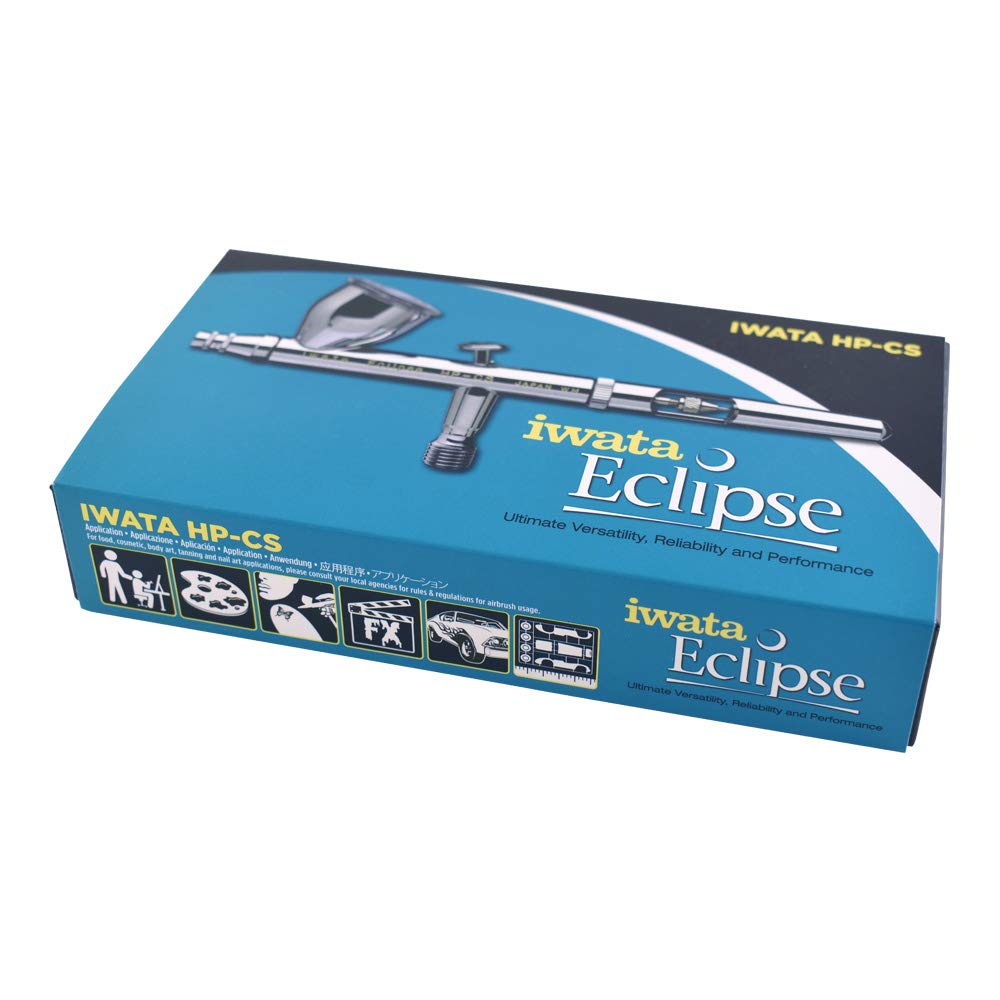
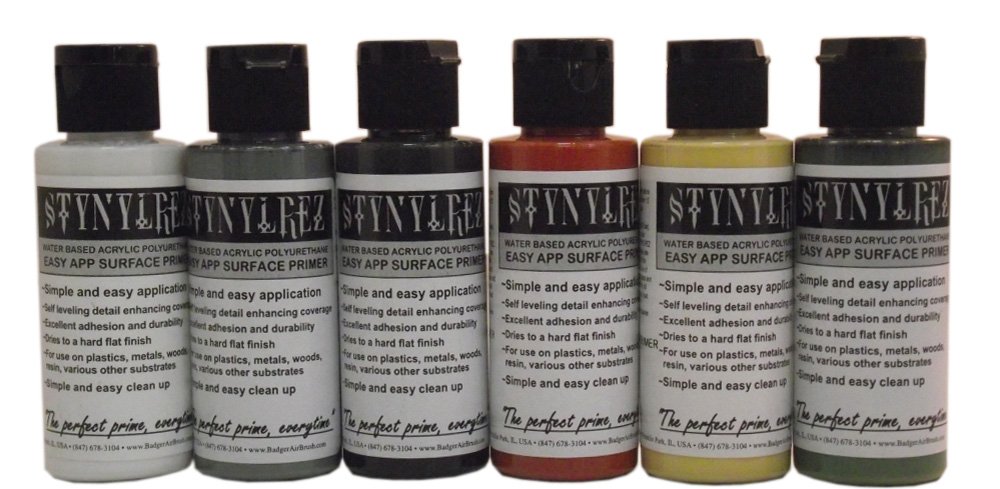
I still swear by my Iwata Eclipse-Medea Airbrush for priming. I haven’t had to re-prime a mini since. It’s expensive, so not for everyone. It also has to be fiddled with from time to time. But that’s because I’m still pretty new to it. For priming, I really like Badger’s Airbrush Primer the best. I mainly use their grey, though they have a nice brown, green, yellow, etc.
Iwata-Medea Eclipse HP CS Airbrush:
https://www.amazon.com/gp/product/B000BQKFA
Badger Stynylrez Primer:
https://www.amazon.com/gp/product/B01F9574CW
Assembly
I’m still sub-assembling most of my minis. Some days I really have to ask myself “WHY?!”, as it’s more work priming, etc. In the end, I can ensure that there are no spots of missing paint and that I can easily get my brush around things. Someday I might change the process, but for now that’s where I’m at.
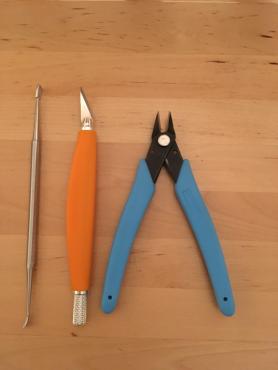
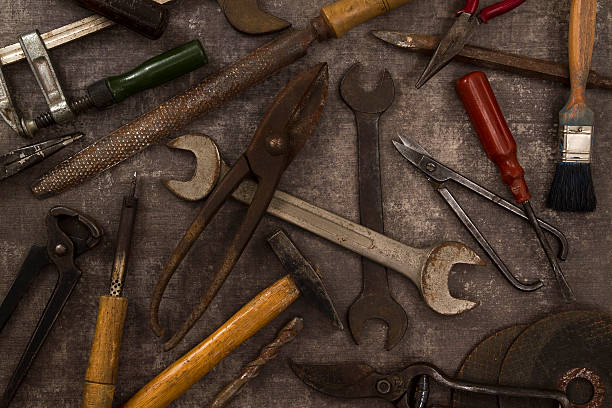
Scraper, Craft knife, Clippers
With assembly, I’m always pulling out those three tools above. I’m using the scraper a bit less and the back of the craft knife more, to remove mould lines.
Also useful during assembly, is some putty and tweezers to hold things in place while positioning and gluing the model.
I’m magnetizing things less, but a pin vise is alway handy when pinning or when I want to add magnets.
Milliput, Green Stuff, and Vallejo Plastic Putty. All still essential for modding and filling things. I’ve recently picked up Apoxie Sculpt as a filler for bases. It’s not as sticky as Green Stuff, nor as gummy as Milliput. It dries into a hard plastic shape. I’ll be experimenting with that more through 2019, I’m sure. For now, I think I might have found my filler solution.
Ok, one last note “Dremel tool”. I’ve found this pretty useful recently in conversion or modding work. So far two bits have proven useful, but I’m still in the experimentation phase. I’ll be sharing more as I go, I’m sure.
Craft knife (Fiskars Softgrip Craft Knife)
Cutters (Xuron 170-II Micro-Shear Flush Cutter)
Scraper (Squadron Products Seam Scraper)
Loctite Fun-Tak: https://www.amazon.com/gp/product/B001F57ZPW
Tweezers: https://www.amazon.com/gp/product/B01N5AU59K
Pin Vise: https://www.amazon.com/gp/product/B01DBN8PLI
Magnets/Bits: https://www.amazon.com/gp/product/B00CA58RJY
Green Stuff: https://www.amazon.com/gp/product/B00MQ7EHHC
Milliput: https://www.amazon.com/gp/product/B001OBBTMW/
Vallejo Plastic Putty: https://www.amazon.com/gp/product/B000PHCNLC
Apoxie Sculpt: https://www.amazon.com/gp/product/B000V58DSU
Brushes
This really should be the bulk of the article, but it’s actually going to be quite short. I’ve found my brush and she’s a keeper.

I talked myself into buying a Winsor & Newton Series 7 brush awhile back, when I saw a decent price on Amazon. Upon trying it out, I could tell the difference right away and it quickly became my goto brush.

This looks like a job for Super-Brush!
I still use my synthetic brushes on occasion. Mainly for washes and over brushing. They are also really good at cleaning paint mishaps. Quickly dip one in water and run it over the area. If I’m quick enough I can usually get the paint spot right off. It seems to work better with the synthetics, maybe because the bristles are stiffer and provide more of a scrub.

Princeton Selects Synthetics.
Once again, if you’re starting out, go with cheap brushes. Synthetics can be found for a decent price and work just fine. If you paint a lot, I would recommend the Winsor & Newton Series 7 miniature brushes. It won’t make you an expert painter, but it will sure make the ride a lot more comfortable. There are other ‘top of the line’ brushes too, like the Raphael Kolinsky Sable. I haven’t tried them, but will eventually experiment with more I’m sure.
Note: W&NS7 has a ‘miniature’ line of brushes, which are a smaller size. They work nicely for our hobby.
Winsor & Newton Series 7 Kolinsky Sable Miniature: https://www.amazon.com/gp/product/B000OL1UUY
Princeton Artist Brush Select Synthetic: https://www.amazon.com/gp/product/B009ONNM2M
Miniature Holder
So, this last year I’ve tried various miniature holder tricks. Paint pots, medicine bottles, corks, etc. with poster putty. I even bought a Games Workshop Miniature Holder. Who won? Quite simply, rubber stoppers with poster putty on top. The weight, shape, and grip of them just works for me.
It also helps quite a bit with my style of sub-assembly painting. With a couple stoppers, and some tape labels, I can keep track of all the parts of a mini while painting them individually.
On the one hand, your mini won’t likely fall out of the GW holder. But it’s not that often that I drop a mini, so the good outweighs the bad.
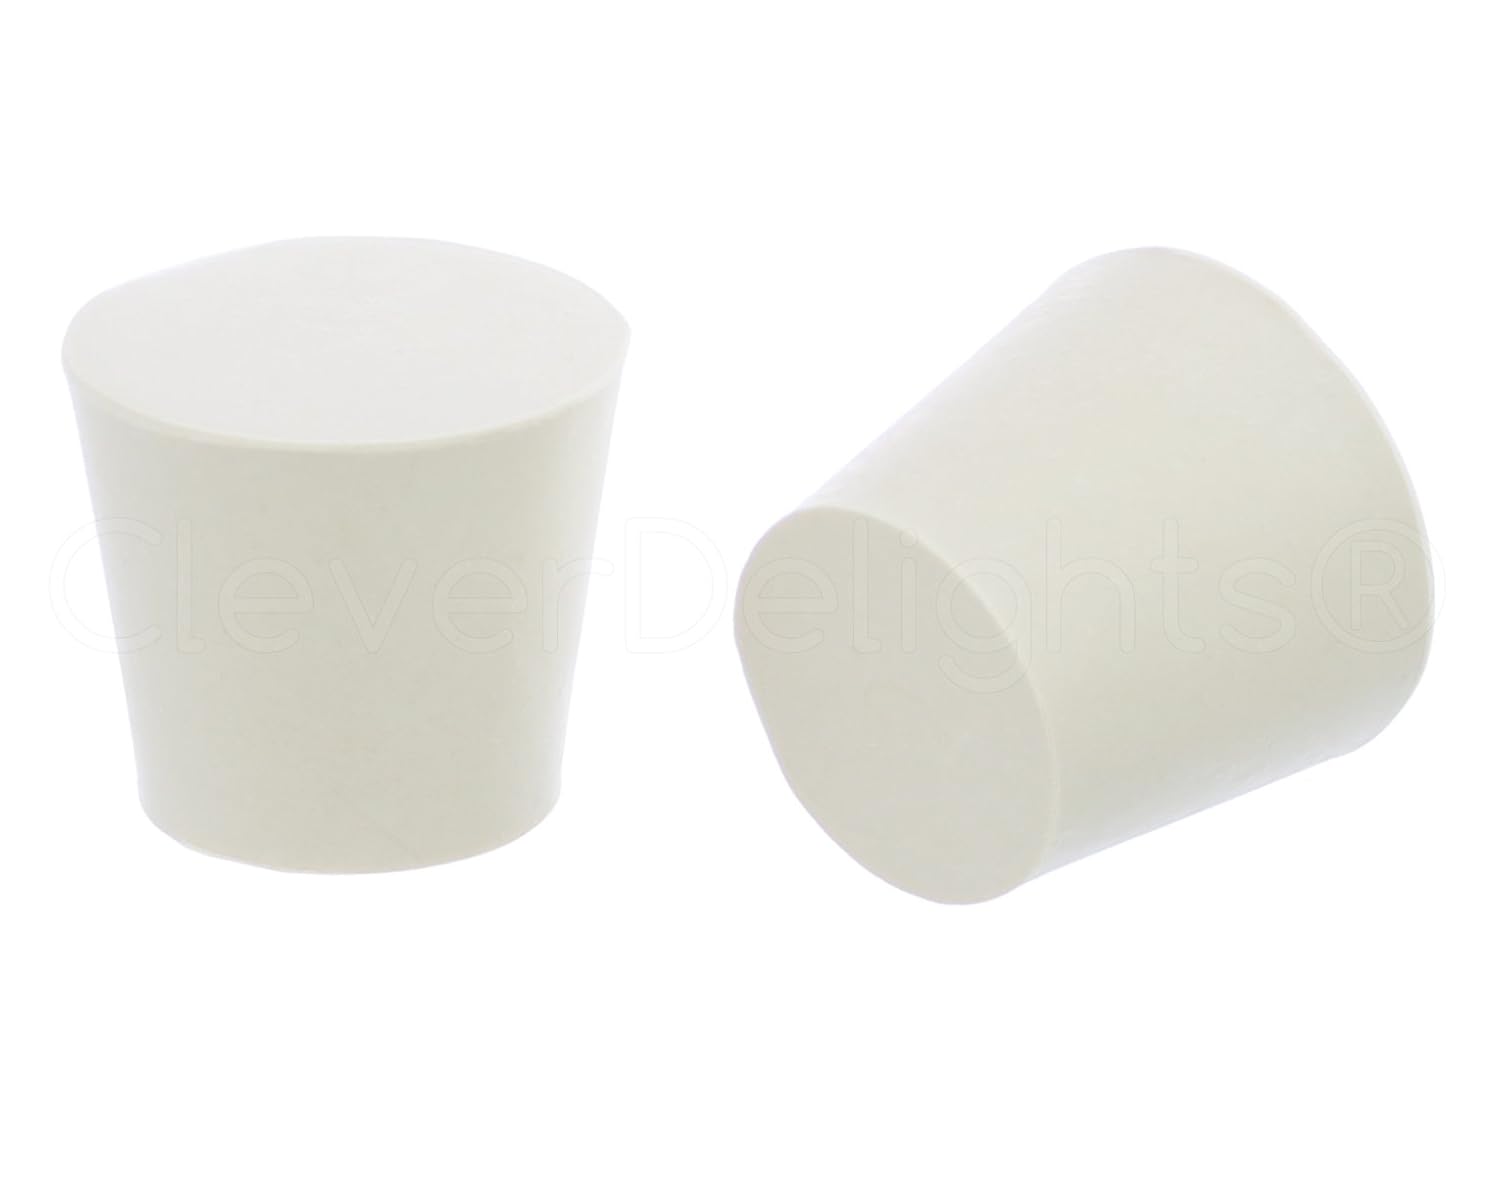
Rubber stoppers: https://www.amazon.com/gp/product/B0747SSR1X
Lighting
I don’t wear glasses normally, but magnifying glasses have been one of the best things I have bought. Allowing me to see much finer detail. I’ve tried a few things, but the cheap reading glasses option has been the most comfortable by far. A few different magnifications is nice, for just general miniature work to more detailed work.

Well, last year I made a total splurge with a gift card. Guilt ridden at the time, but when I’m not doing much else but painting little miniatures, I could almost justify it. I still feel a bit guilty, but it sure is nice and can’t beat it!
What are you going on about, Faust?!
The Daylight Triple Bright Lamp.
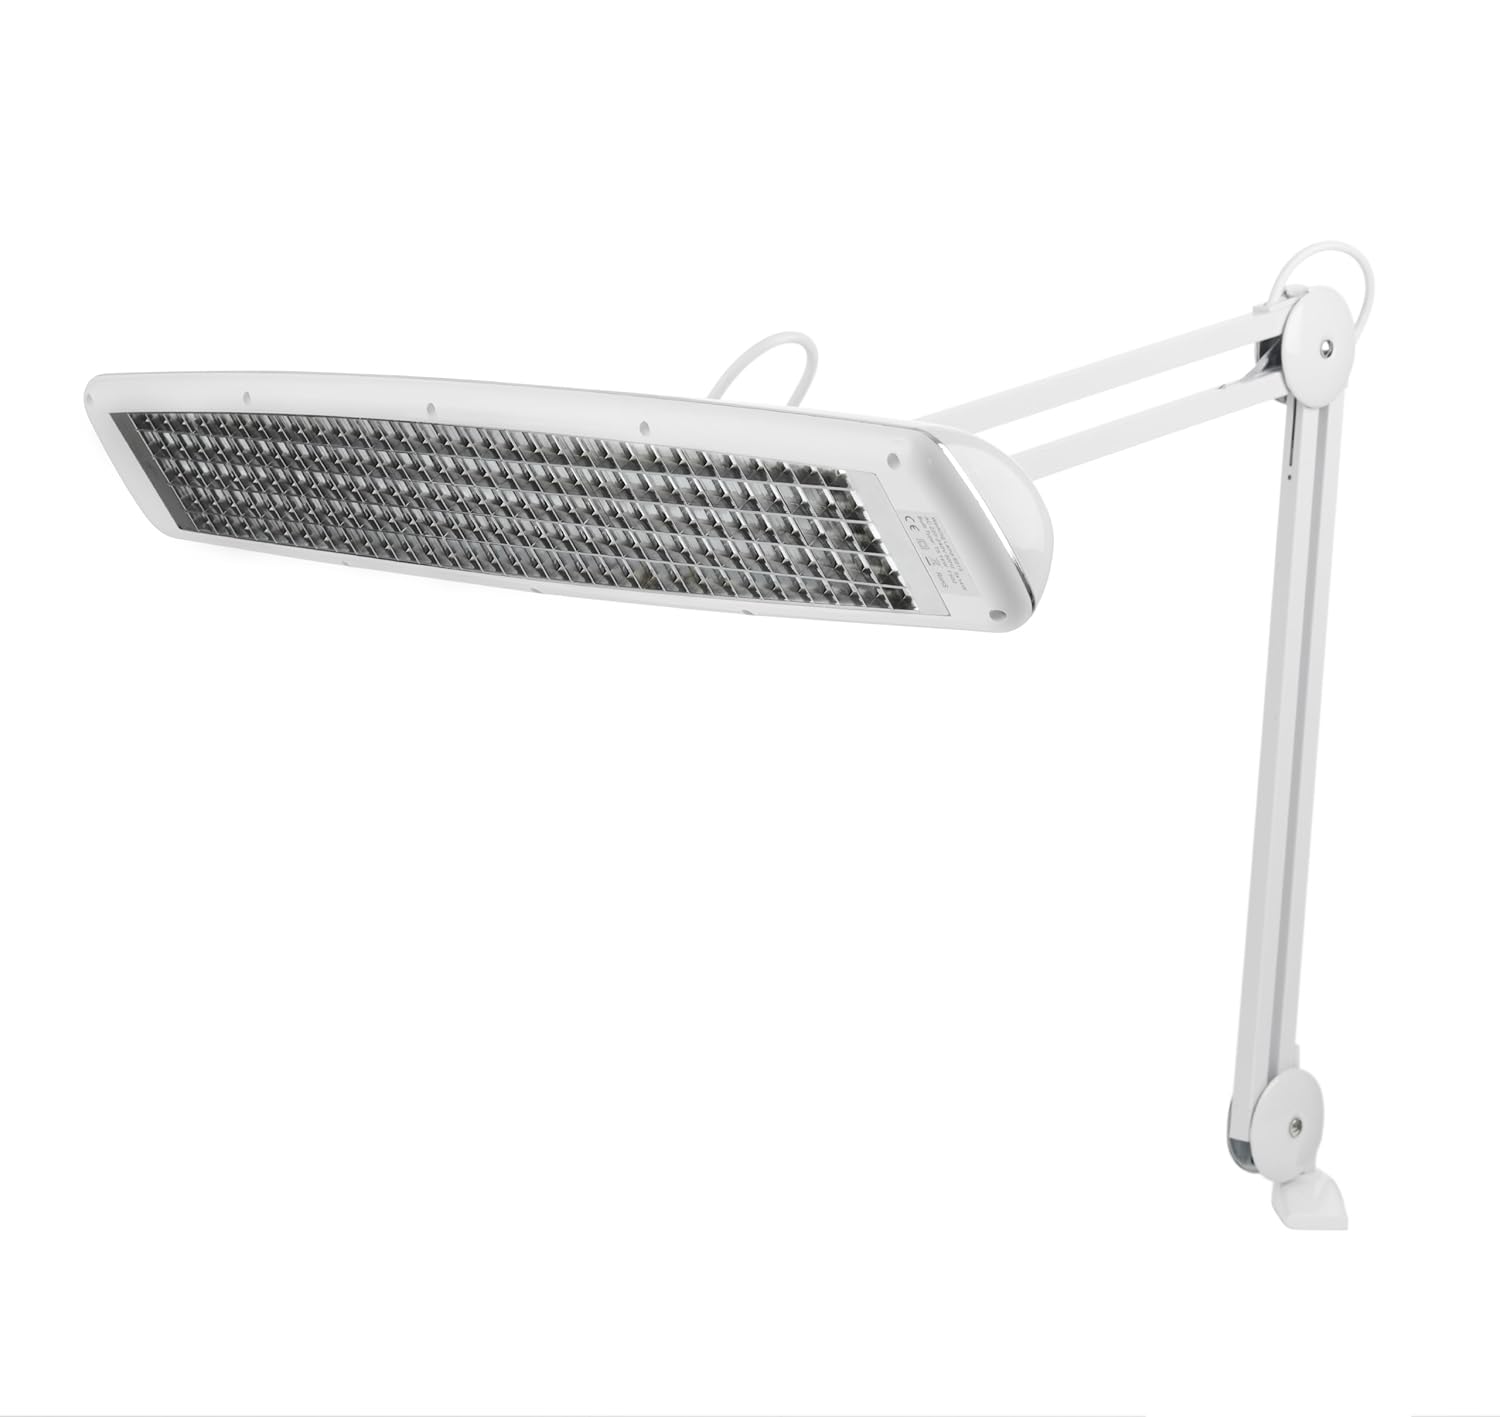
This seems to be the king of lights for those of us in the hobby. Keep a sharp eye out for sales though, as it isn’t cheap at all. Really nice, bright daylight spectrum light. Clipped to my desk, easily adjustable, and I push it back against the wall when I’m all done. I can’t believe how nice it is. No more messing around with a lamp, moving things around, because now the mini is in the damned shadow, etc. I just move it over head, and away I go. Also lets me sit up straight when painting. One more dual purpose, with this lamp, I found I can basically get away without having a photo box. Once I got this light, I found I could tilt it at the mini, and basic lighting problems were solved. Not 100%, because one light can’t cover top to bottom, side to side, but close enough. Downsides are cost and I don’t want to paint anywhere else in the house except under this lamp!
Daylight Triple Bright Lamp: https://www.amazon.com/gp/product/B0052OT64K
Reading glasses: https://www.amazon.com/gp/product/B00LJOQM26
Wet Palette
Honestly, this doesn’t even seem a “thing” to me anymore. Ever since I finally figured out the “secret” to using a water palette, it’s just become second nature and not something to stress over.
As the parent of a toddler. Interruptions are frequent. Even if I pick the time of day when she’s supposed to be sleeping or whatnot. Invariably something will happen and I will get called away to take care of some new crisis. Usually more than once. In the past, that assuredly meant returning to some gunky, drying paint. Grrrrrr.
With the wet palette, it’s a quick rinse of the brush in the water container and walk away. Come back, paint is still good and ready to go. 2+ hour painting session? No problem, can dip back into that paint I started with, and still good to go.
“Secret” I say? Yes, buy Faust’s Tool Tips Books for the now unbelievably low price of $59.99! Screw that, get a container with a lip, a thin sponge, water, and some Parchment Paper! (sounds like it’s called “Baking Paper” in the UK. Should be cellulose based and grease proof).

My mini wet palette. Sushi soy sauce tray. Don’t worry, that’s not my blood.
I originally bought a water palette tray set and paper and sponges. But you really don’t need to. Mine is now gathering dust. The supplied paper did not work (use Parchment Paper!), and the only thing I kept was the sponge. Which I cut into a smaller size, so I could use a container that doesn’t take up a ton of desk space. I doubt there is anything special about the sponge, so something thin would probably do.
Sponge (or look for something thin and cheap): https://www.amazon.com/Masterson-Sta-Wet-Palette-palette-sponges
Parchment paper (one roll will go quite a ways): https://www.amazon.com/PaperChef-Natural-Non-Stick-Culinary-Parchment/dp/B000E7D45W
Paints
Again, such a huge topic, but it’s actually going to be quite short for me. For a good number of years, I was chiefly a Vallejo painter. Cost, bottle design, variety of colors. They seemed to have it all. But then being exposed to more Citadel paints over the last two years, I have been tilting more towards their paint line.
I can’t say that I’m 100% Citadel paints nowadays. That’s not the plan. If a beginner asked me what brand of paints to buy though, I’d have to say Citadel. The base paints seem much better at providing the needed coverage than regular Vallejo paints. Vallejo’s Extra Opaque line is a good alternative, but that can make things more confusing to a beginner. Citadel paints are not as cheap, but I feel they are more forgiving overall.
There is also the bonus of having a lot of color schemes online. Need to paint an Orc, and not sure how to get started…just find a YouTube video, an issue of White Dwarf, checkout their phone app, or hunt online. Chances are you’ll find every single color listed from the primer to the base color of the boot to the final highlight they used for the brow of the mini.
The downsides, higher price and bottle design. I’m still not a fan of the flip-top, open to air, and easy to spill containers that GW put their paints in. For people who grew up with that stuff, probably not a problem. Bugs me though. There is the solution of transferring to dropper bottles. Which given that I only have to do 5-6 bottles, when I order some new paint, is not that bad for me.
So, Citadel is quickly dominating my paint rack, but I still hold onto a number of Vallejo Game Color and Model Color paints. Always good to have some variety as well.
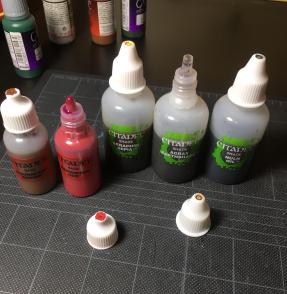
For Washes, I need to experiment more. I have Citadel, Army Painter, and Secret Weapon washes. It’s been force of habit for me to keep grabbing the Citadel ones. The goal is to try out the other Washes more in 2019.
Varnishing
Like a lot of people out there, I’m still applying a spray varnish of Dull Cote to help protect the mini after all the painting is done. I’ve recently picked up some Future to coat the bottoms of the base. They get quite a bit of wear, and the paint seems to flake there on occasion. Probably will end up going on my terrain at some point too. It’s similar to Citadel’s ‘Ard Coat, but you can get a big bottle of it for pretty cheap. There are different forms of it in different parts of the world, so finding the right name/brand can be slightly tricky. For me, it was called “Pledge Floor Care Multi-Surface Finish”. For more info on Future, see this link: http://www.swannysmodels.com/TheCompleteFuture.html Similarly, Dullcote is sometimes hard to find on Amazon. There’s a link below, but I’ve also recently tried Krylon Gallery Series Artist and Clear Coating Aerosol, which was about half the price. I imagine I’ll have more working knowledge with that in 2019.
‘Future’: https://www.amazon.com/gp/product/B00J5HDC4A
Dull cote: https://www.amazon.com/gp/product/B00V89X2D4
Krylon fixative: https://www.amazon.com/gp/product/B004O7HTDQ
Test Strips
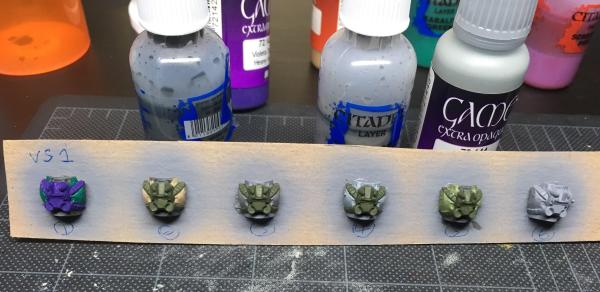
I honestly haven’t been using them much since the Van Saar. The last few models I’ve painted, all relied on GW Color Schemes. Some slight variations on the schemes, but as I knew the paints I was using, I didn’t need to do any testing. At some point, I do want to play around with some skin tones and hair colors to find more recipes that I really like. Sometimes that experimentation just happens within the team that I’m working on ‘Okay, this one will be blond, this one brunette…’. I can sometimes do the same with skin tones. But experimenting on an actual model can be tricky, and if it doesn’t work out, it’s back to the drawing board!
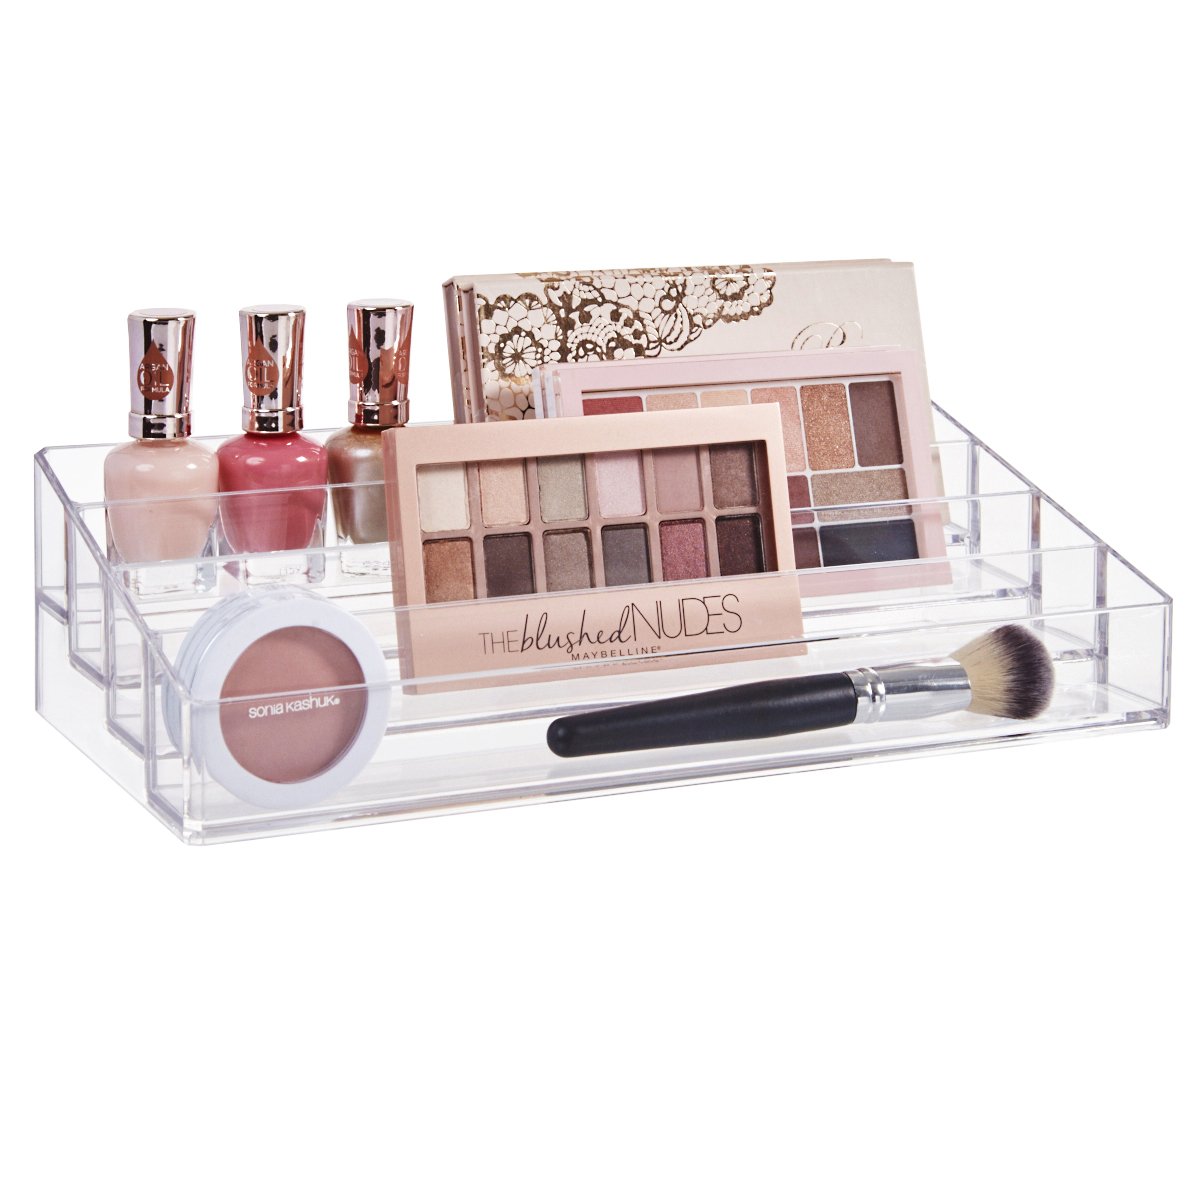
Organization
I really thought I was going to be better at this, but I’m not happy with myself. I bought boxes to hold my paints in and organized them by color. Then I end up pulling a large number of paints and having them all over my desk.
Then I bought one of these things, to hold the paints on my desk:
And what does my desk look like?

Well, you can probably see the mess of bottles in the background there. That’s probably about 1/4 of what’s covering my desk right now.
I did get around to organizing them in that tray, a couple weeks ago. Then when I started to hurriedly get some minis game ready before the in-laws arrived, it all went to crap. I guess as I work on more than one project at a time, it’s something I’ll probably just have to get used to. Potentially followed by a cleanup period after a big project. Regroup and gather the forces! Hopefully this is one area I can improve on in 2019.
Another area of organization for me, is miniature storage. This has been a rather large work in progress the last couple months. I’ll be posting my findings in it’s own post later.
Wrap Up
That’s it for 2018! Lots of experimentation going on and finding out what works and doesn’t. I’m curious if 2019 will be more of the same, or if I will have figured out most of it at that point. Happy New Year to you all!

A great round up, with everything all in one post! I maybe need to experiment more with “green stuff” equivalents! Hope you have a great New Year!
LikeLiked by 2 people
Green Stuff, Milliput, Apoxie Sculpt, Vallejo Plastic Putty, and the good old Baking Soda + Super Glue seem to cover just about any situation. Mixing Milliput and Green Stuff together is quite nice too. So far I haven’t found a “one size fits all” solution. I doubt it exists, because each type has it owns characteristics and uses.
Thanks again, JNV!
LikeLiked by 1 person
Nice round up mate and Merry Christmas and Happy New Year to you and your family.
LikeLiked by 1 person
Thanks TIM! Merry Christmas to you all as well! This post actually has been stick in my mind for sometime, when you had mentioned ‘keeping the Tool Tips’ posts up to date! 😉
LikeLiked by 1 person
Nice to know I have some uses! 😊
LikeLiked by 1 person
An interesting post man. I think most hobbyists have/use a lot more tools than I do. I keep things very, very simple. So implement that I think a lot of you would grimace at how I go about things hehe. I’ve been tempted on the Windsor brushes for quite a while so maybe it’s time. Have a good Chrissy brother.
LikeLiked by 2 people
You too, man! Hope Santa brings you a W&NS7 for Christmas! 🙂
LikeLiked by 1 person
Nice round up Faust! It’s always interesting to see what other hobbyists use. I’m still on milk bottle tops to hold my models while I paint them!
LikeLiked by 2 people
Thanks DK! Sometimes the old ways work best!
LikeLike
Great post- gives me some ideas. I should really try the wet palette someday soon.
Cheers,
Pete.
LikeLiked by 1 person
Oh man, try it out as soon as you can! Another thing, you might try is magnetizing the Van Saar arms. The cavity in the arms and shoulder joints is just perfect. You do have to figure out how to keep the shoulder pads on though, which is a bit tricky. But given the way there made and all the possibilities of the gang, just seems like a natural thing to do. Now, if I can only finish painting mine someday! Cheers Pete!
LikeLiked by 1 person
Thanks for the tip- I’ll try it with the next box of them I get.
Cheers,
Pete.
LikeLiked by 1 person
Hehe, guess you like them, if you’re going for box #2! 😃😃
Honestly, I hope to see another box, as they have been the hardest for me to paint so far. I do like the weapons though. Maybe once I see them in action, I’ll change my mind.
LikeLiked by 1 person
Nice round-up. The one thing I’m really looking at expanding/experimenting more with is other paint lines. Specifically, for highlights. I love GW’s Base paints, but for the most part, the paints they have available to highlight from there are lighter shades, rather than brighter ones, which doesn’t really fit too well with how lighting actually works.
That said, I’m also moving in 2019, so we’ll see if any actual experimentation takes place or not.
LikeLiked by 1 person
Thanks Alexis, good luck on the move and the experimentation. It’s funny how I’ve kinda settled on one paint line now. I imagine as I keep going, I’ll want to add in more though.
LikeLike
I’ve really enjoyed this series. It’s given me loads to think about and some I might even try 😀. Not having a dedicated paint area does mean most of my bits are wedged into a citadel project box (and the chopping board used for current projects) and unpacked and repacked between each session. Means I have a fairly minimalist tool selection. I am very tempted by the paint brush though
LikeLiked by 1 person
Oh and happy Xmas of course
LikeLike
Happy Xmas to you as well, BtH! 😃
LikeLiked by 1 person
I should have mentioned dedicated painting area. That was a big one for me. My painting time expanded and was less of a chore. Though, guests arrive tomorrow, and I’ll lose my paint area for at least a week. Not many other places that I can setup, but I’m still trying to work that angle!
LikeLiked by 1 person
Nice write-up. Airbrushing is still the bane of my existence, though. Probably doesn’t help that I don’t really have a good space for it, and it seems like an awful lot of stuffing around unless you’re really doing batches of things, and even then the cleanup is offputting. I bought a few airbrushes of some description a few months ago now. I think they’re in the shed, still in their packaging. Somewhere.
Wet palette was a bit of the same. I appreciate the value, but it’s just a meh thing for me. I think my painting is too scattershot going from project to completely different project (and model) to make proper use of it, though mine still sit on my desk. There are half-painted and half-assembled models sitting on top of it! 😀
Storage is the other thing I struggle with. When I work out a good solution (aside from buy a bigger house), I’ll let you know!
LikeLiked by 1 person
Wait a sec, you don’t use a wet palette? That’s surprising to me. If desk space is an issue, just make a small one like I did.
Yea, airbrush cleanup is way easier for me than rattle can cleanup in the garage. Sounds like you have decent weather though, and spraying outside doesn’t have much in the way of cleanup luckily. For me, it’s been about the only way that I *can* prime minis, due to time, cleanup, weather, etc. But if you got a method that works for you, without all the upfront airbrush cost, then it sounds like you’re set! 🙂
LikeLiked by 1 person
It’s small. And the desk isn’t, but.. the best way to describe it would be to say it’s overgrown. I’ll take a pic sometime. But the thing was that I used it, and it was …fine. But not earth-shattering. I didn’t even stop using it by “design”, it just sorta faded into the background slowly, and then became a place to store half-painted models.
I do my spraying outside, in the back yard. Sadly, I’ve spent the upfront cost of the airbrush and compressor and all the gubbinz, I’ve unfortunately just never taken to it.
LikeLiked by 1 person
Hmm, so I’m guessing you don’t run into problems with paint drying out? I’m not sure how you manage to overcome that? I’ll have to guess you paint much faster, and given the amount of minis you have, that’s a fair assumption.
LikeLiked by 1 person
I do use thinner, water and mediums. For blending, I tend to use thinned down paints rather than a million layers of slightly lighter shades. (one or two or three, not like 8 or 10 or 15 – even now that seems entirely redundant). Occasionally, I’ll wet-blend, but on the model. I also take a lot of breaks, and just come back to things.
LikeLiked by 1 person
Yea, I use Flowaid. First to decant. Then I typically add about 1:1 Flowaid to paint. Sometimes just water. Coverage is like you, 1-3 layers. Yellow being the worst of course.
Even with that, my paint will dry out pretty quick. I often have an overhead fan going and the computer going. The fan is definitely on during the Summer, as my Fam is mostly AV adverse (ugh!).
LikeLike
AV adverse? AC averse? I couldn’t live without the AC these days, especially over summer. It’s been 35 degrees here today (95F) and going to be much the same all week. I grew up without one, and even in my early 20’s I used to “escape” the heat by going for a bike ride – because even in extreme heat the wind on my sweat was cooler than staying at home. 😛
LikeLiked by 1 person
Pretty sure that was auto-correct and not a lack of caffeine on my part! Yes, “AC Averse”. Being a ginger, I tend to overheat and get sun burnt easier. Whereas my Wife would probably be just fine running around the jungle in a parka. Them’s the breaks!
LikeLiked by 1 person
Just get an AC in one room, and you can live in there for three or so months of the year!
LikeLiked by 1 person
Yep, that’s come up before. If temps continue to rise, I can imagine a portable AC unit popping up on the Christmas list.
LikeLike