
The Challenge
“…So we’re going to have “Technical August”, where the objective is to use techniques that stretch you a little, that you want to improve on, or are entirely new.”
For more details regarding this Community Miniature painting challenge, please check out Azazel’s site: https://azazelx.com/2018/07/24/august-2018-hobby-challenge-technical-august/
He’s got a great site, puts out a lot of superbly painted miniatures, and heads up all these cool (and easy) Challenges.
So, let’s get ….
TECHNICAL
Whoa, whoa, Faust!! That’s not a techno song dedication?! Yea, but it’s a cool song that I randomly found off the “Robots” soundtrack (a movie I haven’t even seen), features a band close to Aussie land, and is a pretty technical video. One of the coolest I’ve probably seen since way back when MTV played music videos. I’ve been wanting to sneak that one in for awhile, and it probably wouldn’t work for a Necromunda gang. So there you go. Thank me later, haha!
Entries
Yea, you read that right. “Entries”. Plural. Although to be honest, this is a hodgepodge of smaller stuff. I really wanted to try more and bigger things, but fates being what they are, this is what I managed. Hopefully still enjoyable to some.
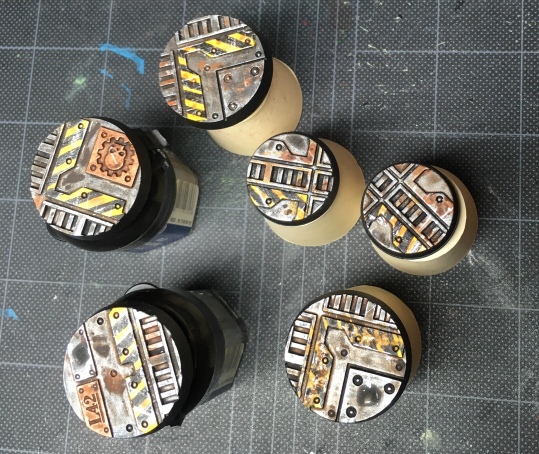
Rusted bases.
“But Faust, you did those..”.
“Shut it, kid! They’ll never know the difference.”.
Yea, I’ve done rusted bases before using thinned Skrag Brown, but this time I’ve experimented with Vallejo Mecha Weathering Washes – Dark and Light Rust. Azazel tipped me to this, and so I checked it out. Honestly, when I got it and realized it was a wash, I was a little concerned.
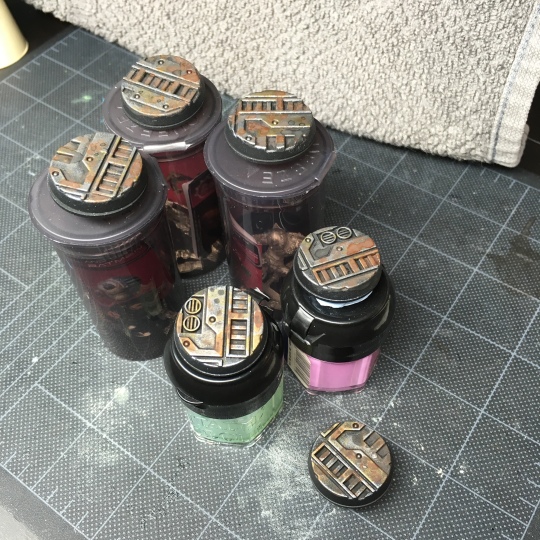
No worries, turned out rather nice once I got comfortable with spotting. Apply neat, with a brush, and twist of lime.
But how does it compare to thinned down Skrag Brown?
(skrag brown rust in the middle)
Honestly, kinda like the darker rust color of the Skrag better. But I could see mixing all these effects to come up with something really nice.
Hazard Stripes.
Always thought they were cool looking, never painted them. Don’t tell the teen, I steal his legos when he isn’t looking… I marked off lines using what I thought would work decently. Then tried using some Acrylic Paint Pens (yes, these are a thing). I had tried them once for tattoos on the Goliath. And for some reason, they are still total crap. Much harder to write with than just using a paint brush, and it dries to a somewhat inky finish that you can’t paint over.
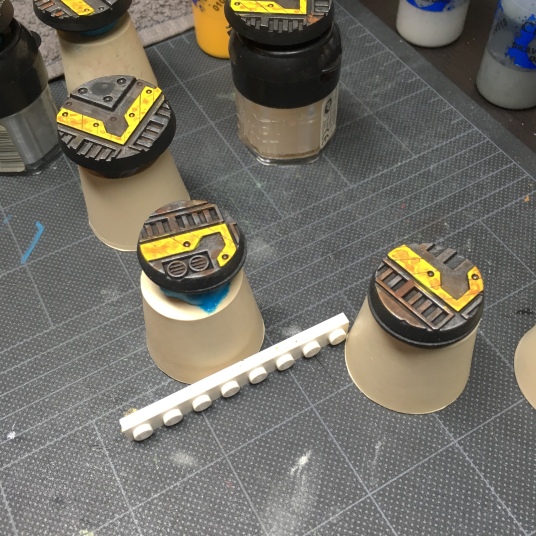
In the picture below, you can see two of the more messed up ones on the bottom right. The lego turned out to be too thick of lines, and I ended up spending more time redoing that and the acrylic paint pen, than it would have taken me to just straight paint on the lines, which is what I ended up doing for the rest.
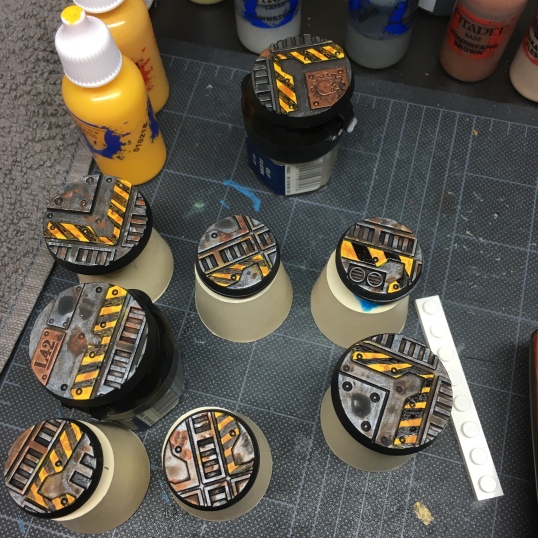
Adding some scratched weathering helped things quite a bit.
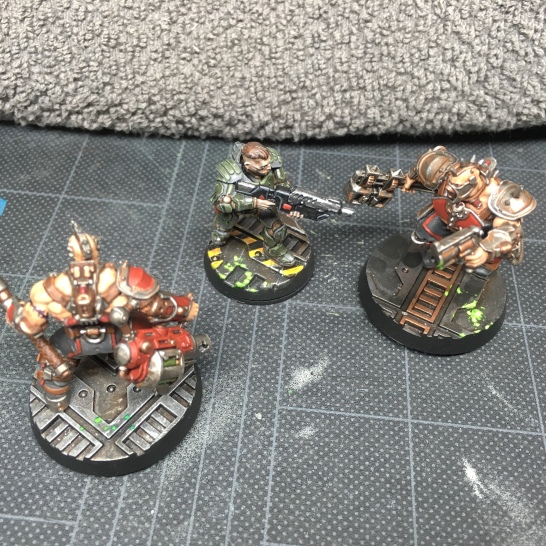
Glowies.
So I’ve also wanted to try a radiation goo sort of looking technique. Mostly involves Moot Green and using a sponge. I have to say I’m crap with a sponge, and the video tutorial at the end, makes it look like a walk in the park. Mine looks ‘ok’, but nothing like his.On a few pieces I started with some darker Kabalite Green, just to see what would happen. Not really “radioactive”, but it was interesting.
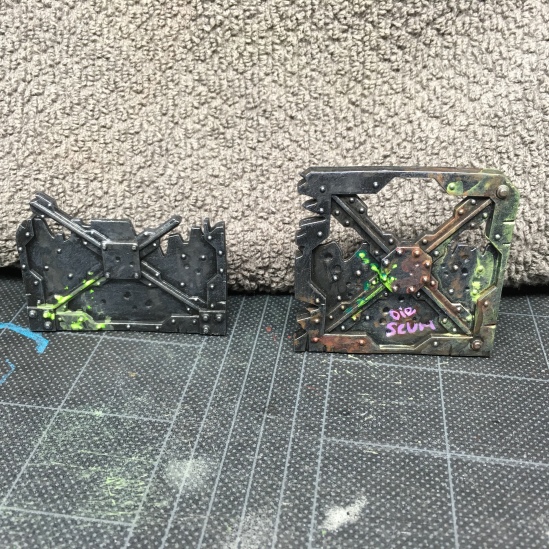
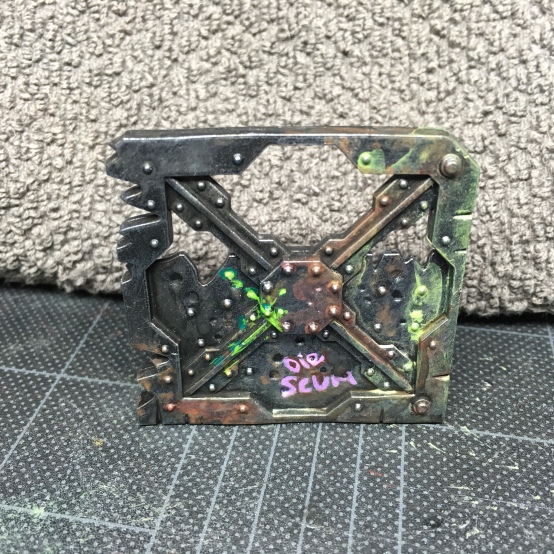
Don’t recall if I had shared my Necromunda terrain in the past. I got a few pieces in a “done” state. The one on the left, is definitely far from it. The one on the right, ignore the green on the right/upper corner, as that was there before. I might have been thinking that would be a “radioactive” effect at the time, but it’s far from it.
For the glowy effect, you can check out this tutorial:
More?
Remember this guy? You might have seen him lurking around.

He’s basically been sitting around in a drawer like that for awhile. Being a hollow, fragile, 3D printed piece of brittle plastic, I kept thinking “I need to get it on a flight stand, so it’s not getting all jostled around!”.
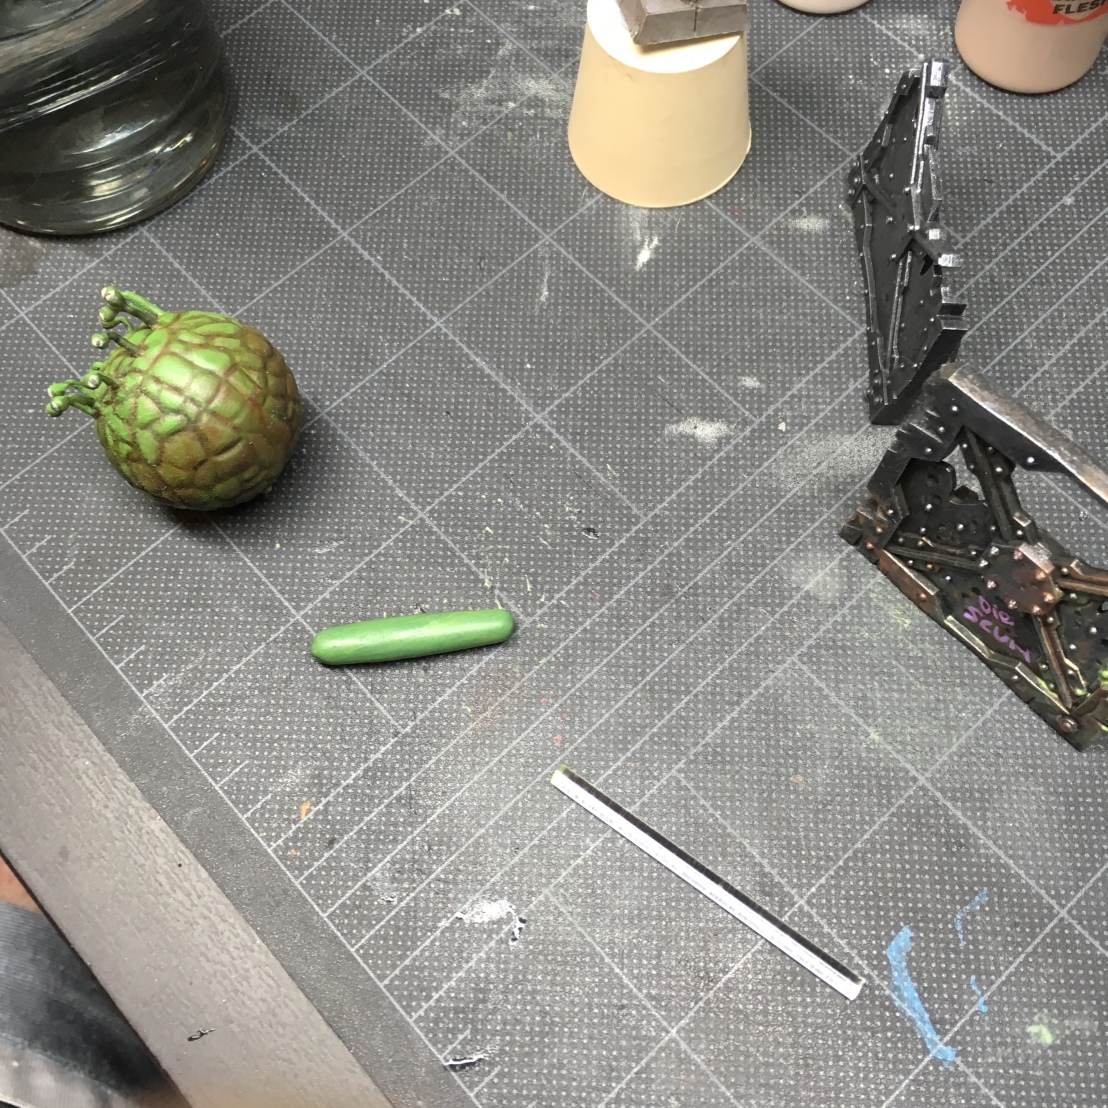
He’s hollow, as I mentioned, and he has a small hole at the bottom (like a lot of us). So this became tricky. Maybe say I’m sorry, and cram some green stuff into him and then try to stick the flight stand into that? Yea, kinda worked, and oh yea, sorry guy.
Wait, this is supposed to be technical?! Ok, back to that…Spiritstone! Gem paint! Thanks Azazel!
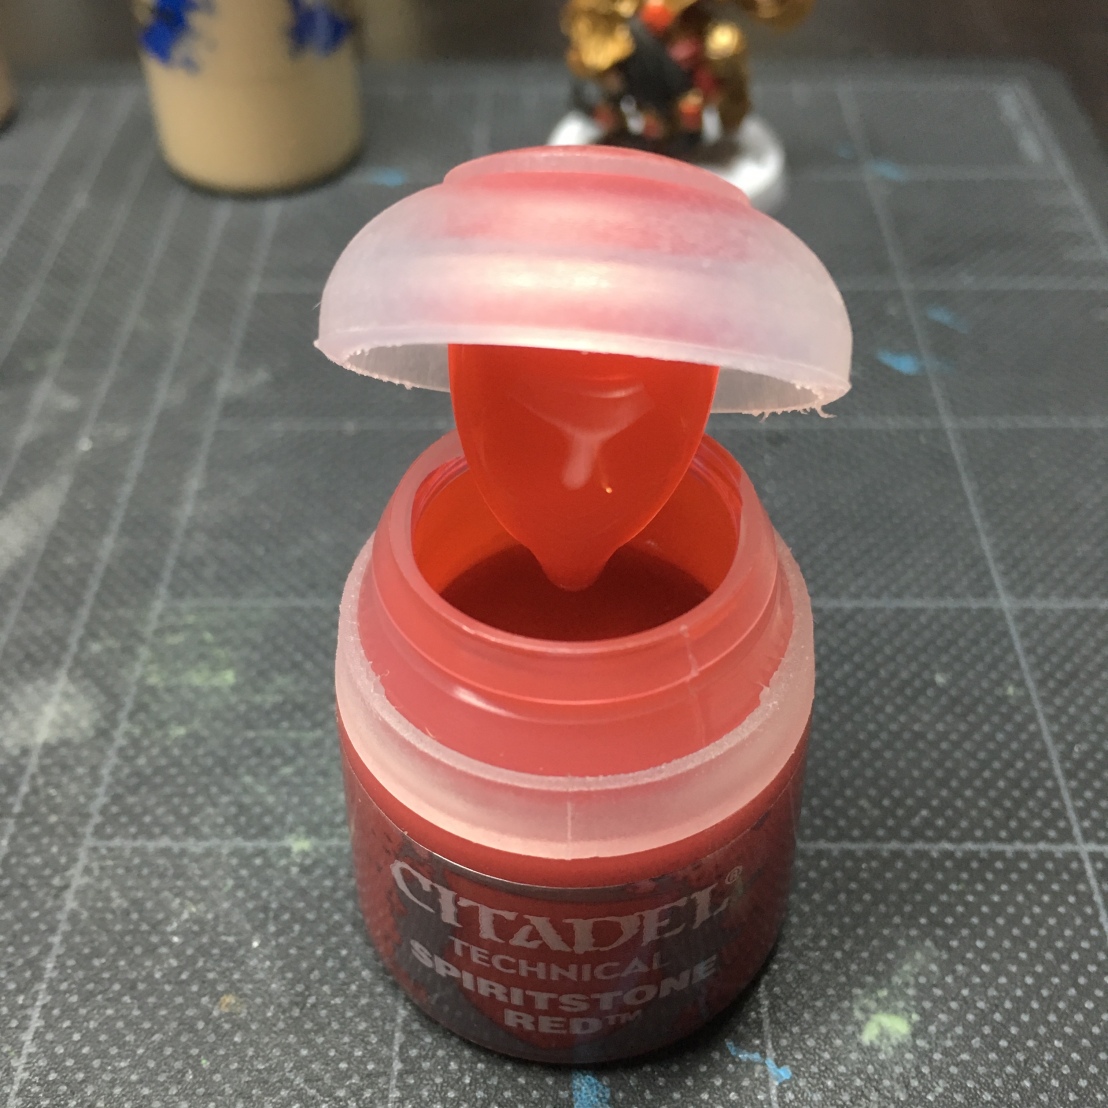
A really weird paint to work with, and is supposed to be good for gems and other effects.
I tried to capture the consistency and look, it turns out something like Caro Syrup. It paints a little odd too. I’m not sure how to even describe it.
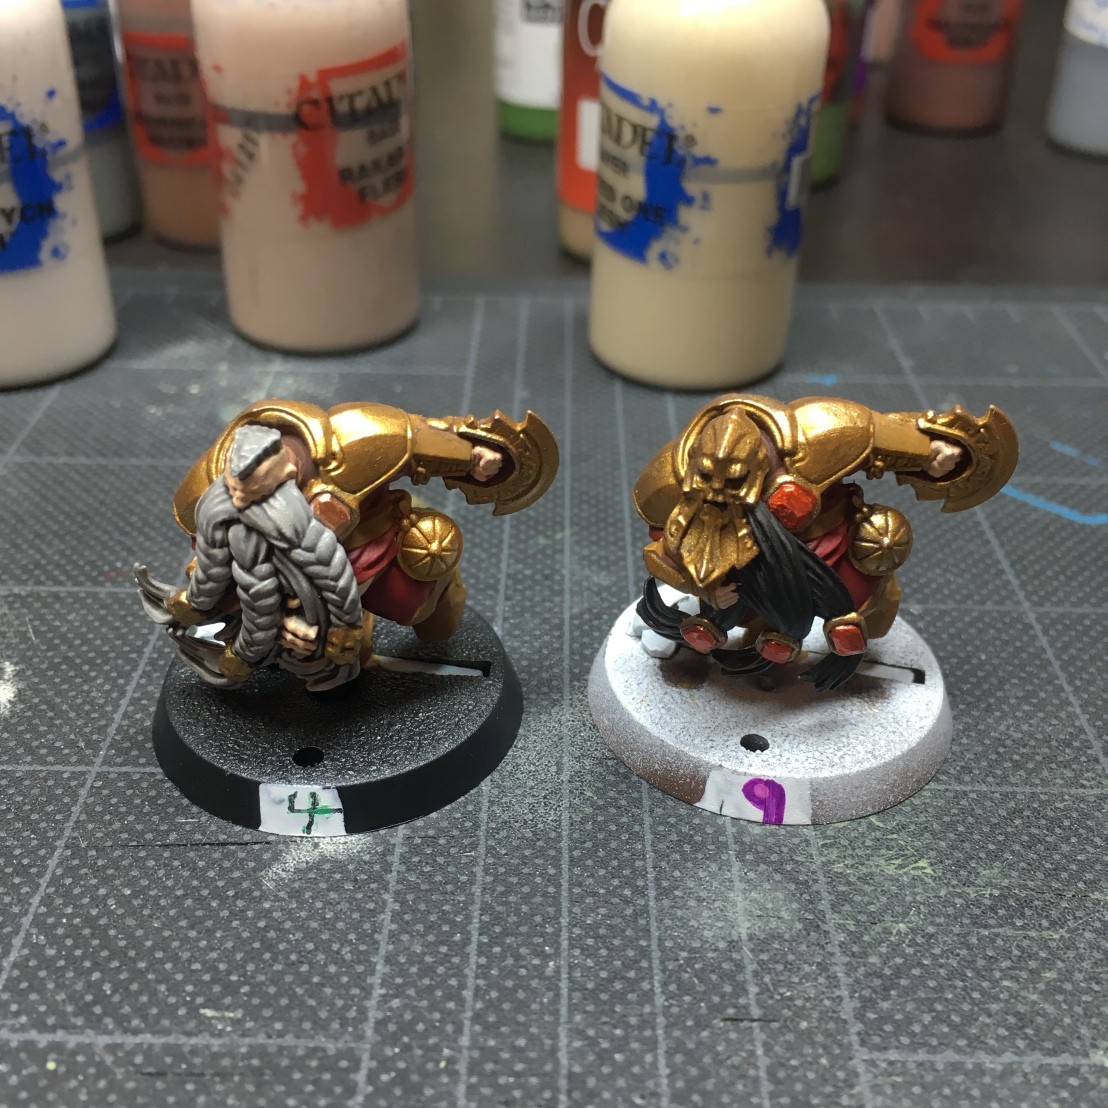
So I have these Dwarves, and I’ve been kind of dreading doing gems, because it’s all new to me, and I don’t want to mess it up. On the plus side, gems are small and it’s not like screwing up eyes. I watched a WarhammerTV video, and they said ‘paint a shiny color, then paint your Spiritstone, giving it a little smear/drag’. All fine and good, except it doesn’t give you any light/shadow effects. I found another article later on, that suggests painting with a darker and a lighter metal, to add light/dark areas. I didn’t get around to that this time, but it’s in the back of my brain now. The Dwarf on the left has a base of Balthasar Gold. Dwarf on the right has Spiritstone Red painted over the Balthasar.
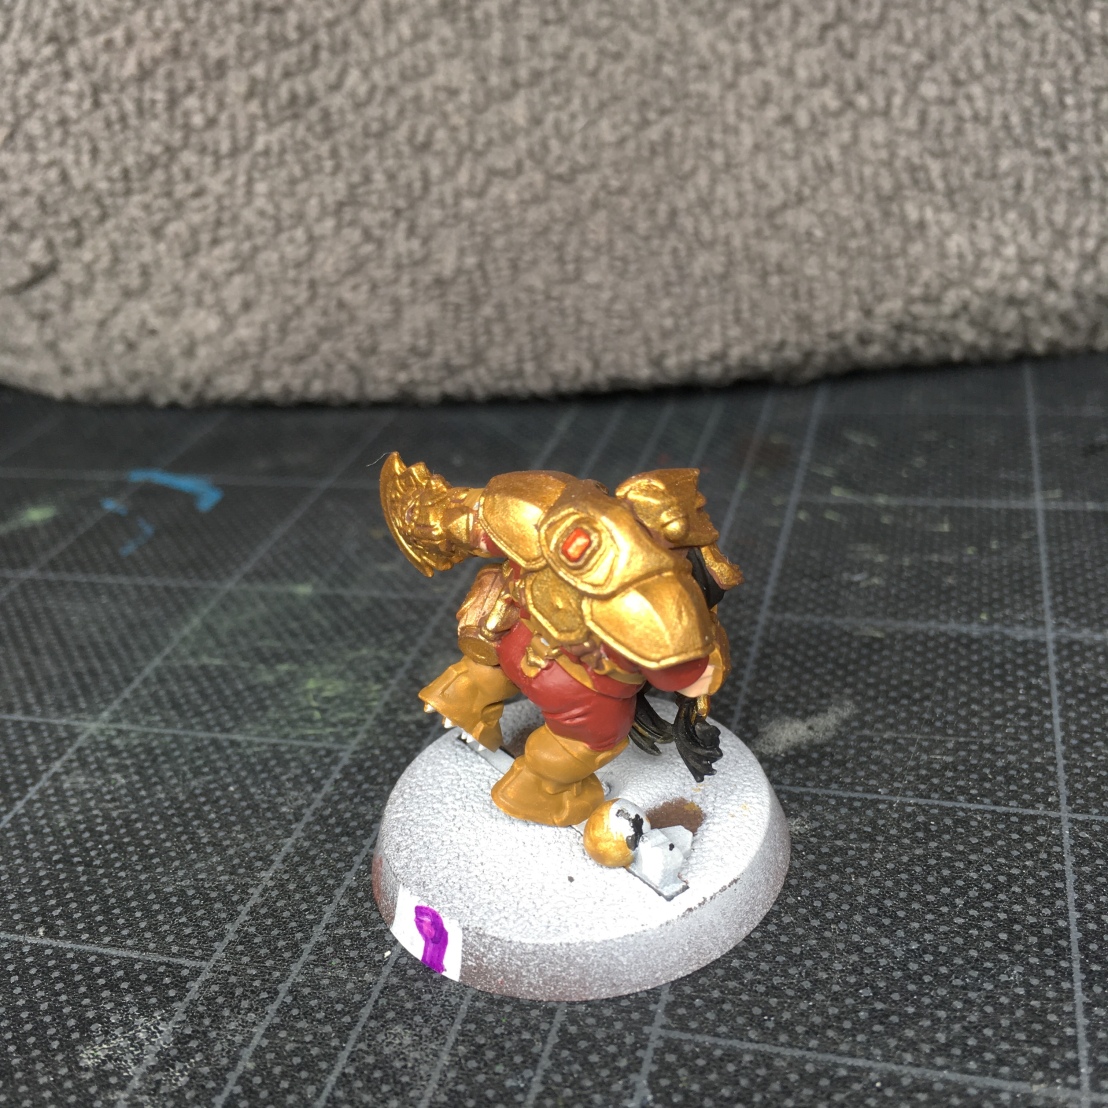
Camera doesn’t seem to be able to capture the effect at all, unfortunately. It ends up sort of glossy, sort of metallic and shiny. And I can’t describe it very well at all, so moving on!
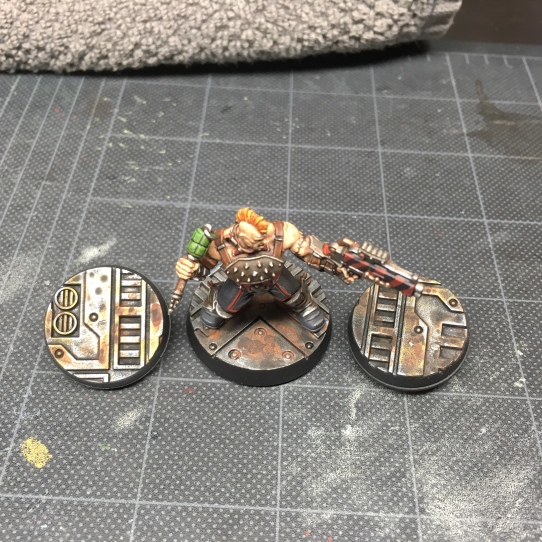
Back to this guy again!
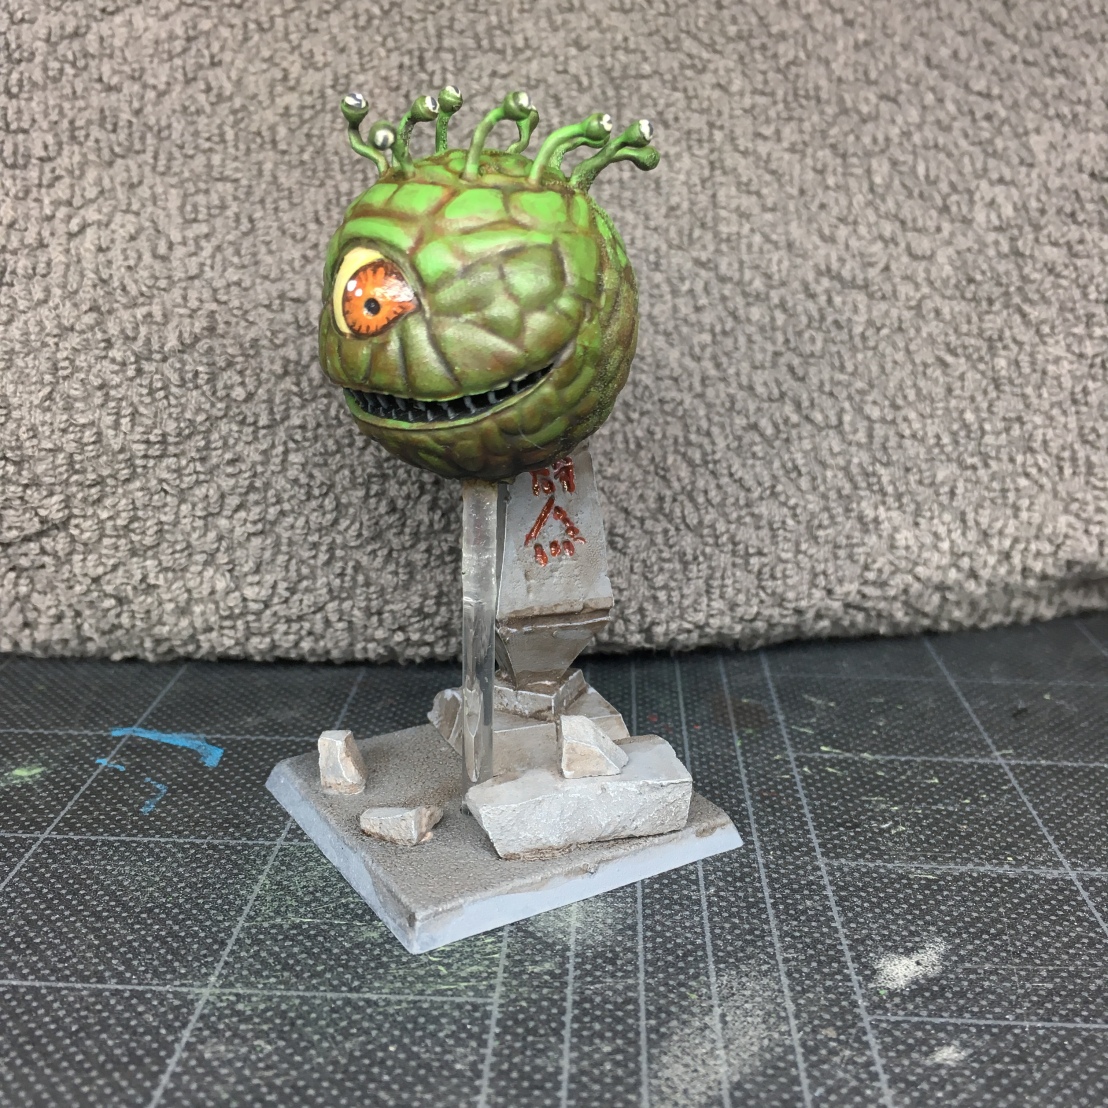
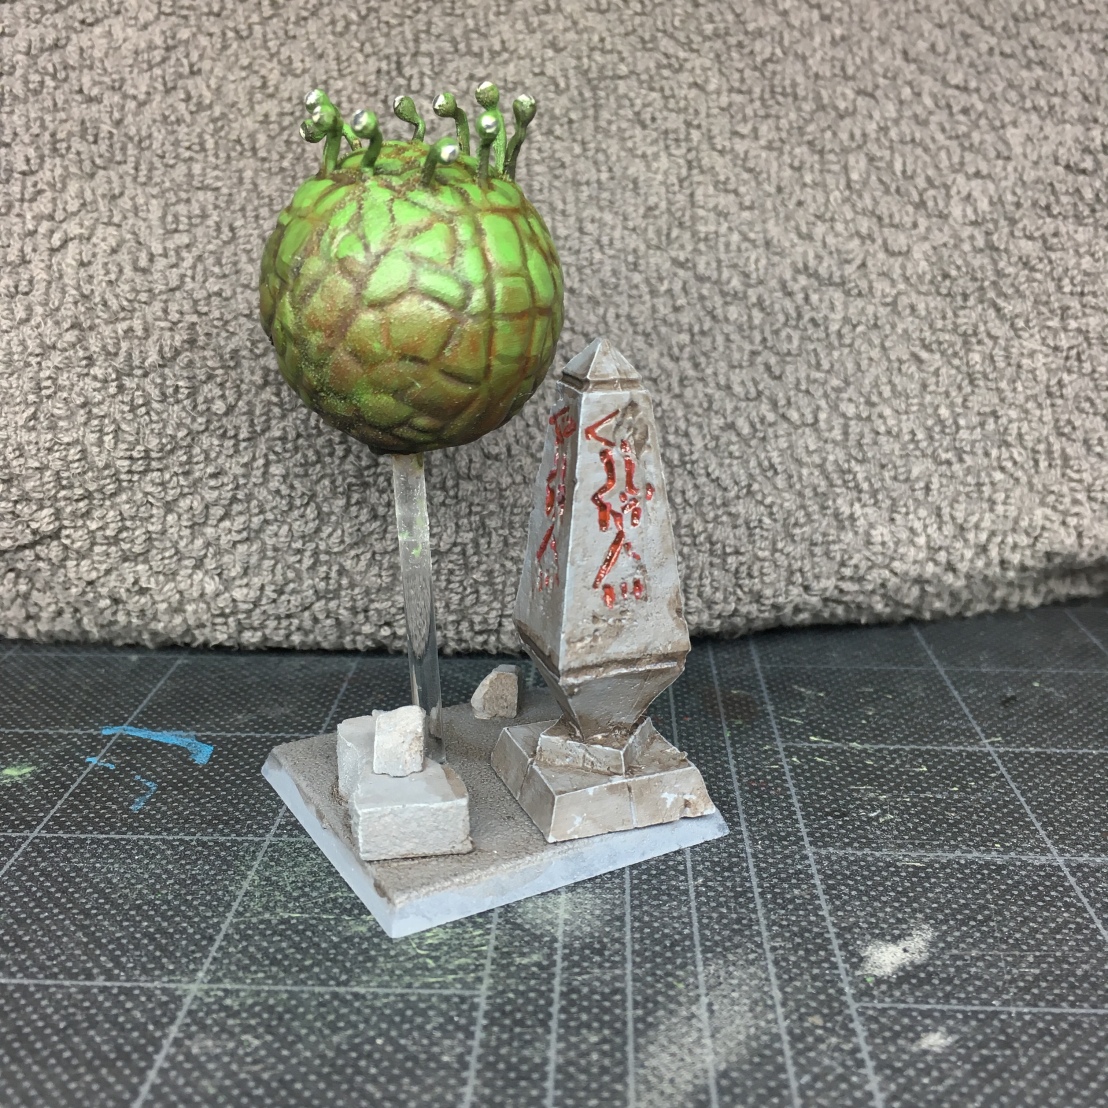
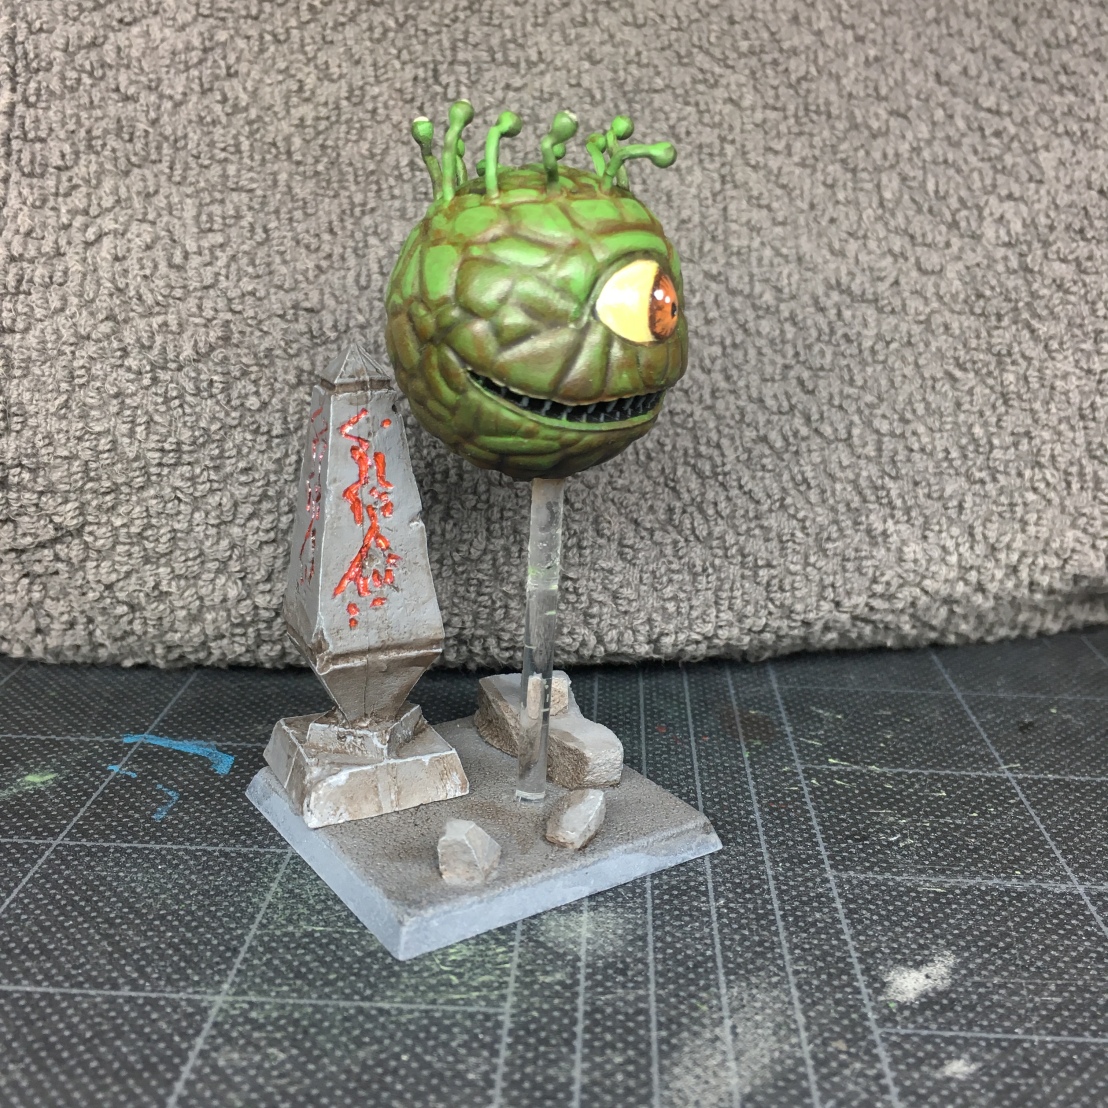
I put together that base, using rocks (first time again), primed them up, painted away. Camera sure hates me. In hindsight I might have used more rocks, and I will paint the trim of the base black (which I forgot to do before picture time!!).
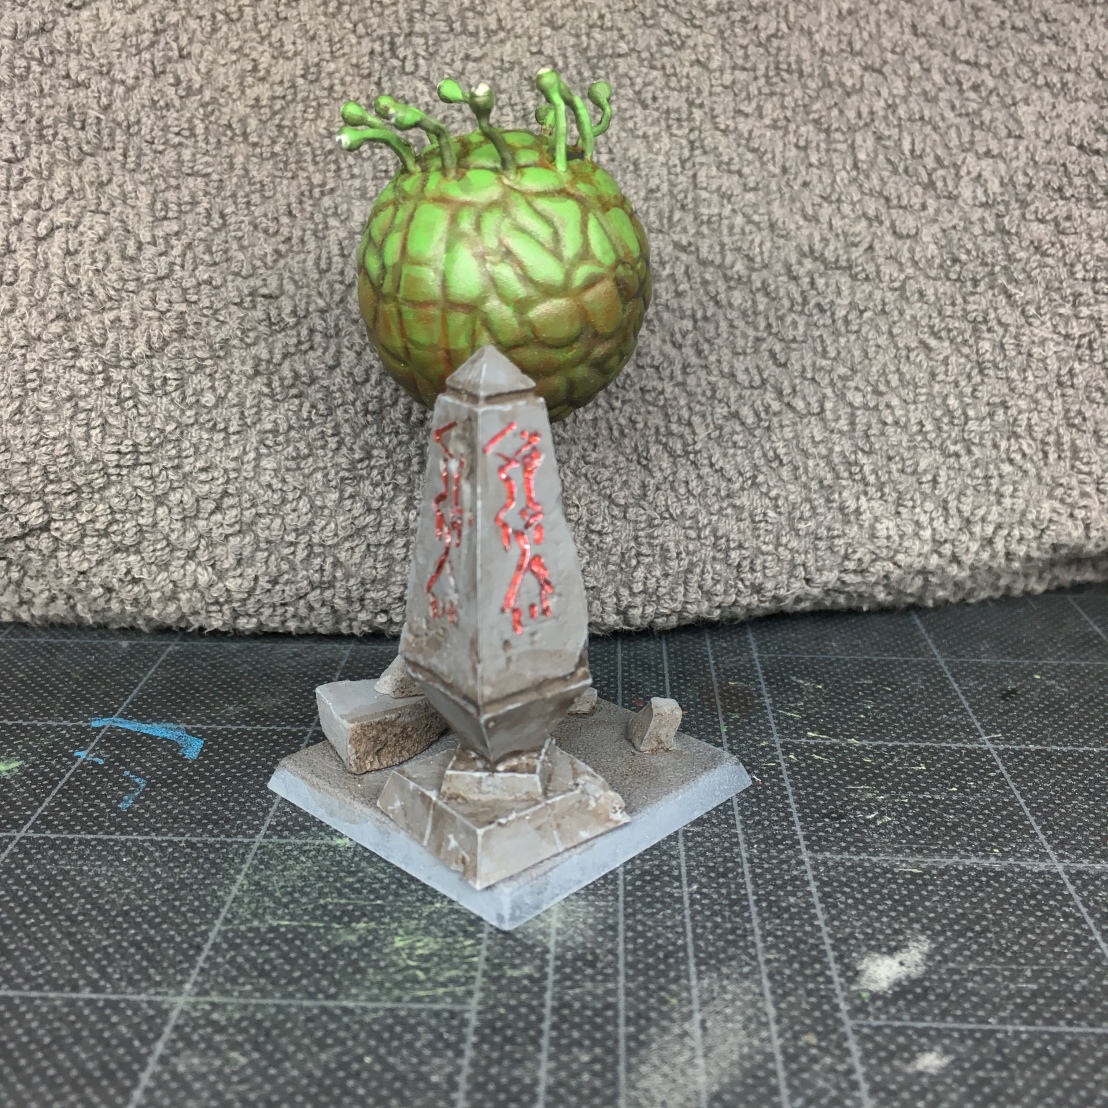
The “Waystone” is a piece of “Tiny Terrain”: https://www.miniaturemarket.com/tt032.html
They are cheap, and Miniature Market will often throw one in for free with an order. Pretty cool stuff. I painted it up, marking the runes with silver base, and Spiritstone Red on two sides. And Agrax Earthshade wash and Spiritstone Red on the other. To give a ‘lighting up’ effect on some of the sides. In retrospect, I might have painted individual runes light/dark on the same face.
The main thing, he’s on a base and has some points of interest around him, without detracting too much from the mini either. Oh yea, added some Ardcoat to the eyes, to give a little gloss. Another first!
Wrap Up!
Rusted bases, hazard stripes, moot green glows, and Spiritstone. I wish I had time to do more, or even play around with individual techniques more, but you take what you can get. We’re off to vacation soon, so had to wrap up things as I could beforehand. Wish you all well on your own Technical Challenges!

This all looks good to me and thanks for sharing! Have a good holiday!
LikeLiked by 2 people
Thanks JNV! 😀
LikeLiked by 1 person
Nice work! I tend to combine spiritstone with blood for the blood god, since as you found out, it’s a bit light, especially for larger gems. (it’s fine for the widdle ones). You can always use a bit of bftbg on top of the gems later. Or yes, paint a bit of the gems darker up top (too late for that guy, though!)
Looking at that little plinith.. You could have used that as your stand. Have some brass rod or something going in from a side angle. Hidden because he’s *just* brushing past it at that exact point. Still, it does look good as is, and that’s the main thing! 🙂
LikeLiked by 3 people
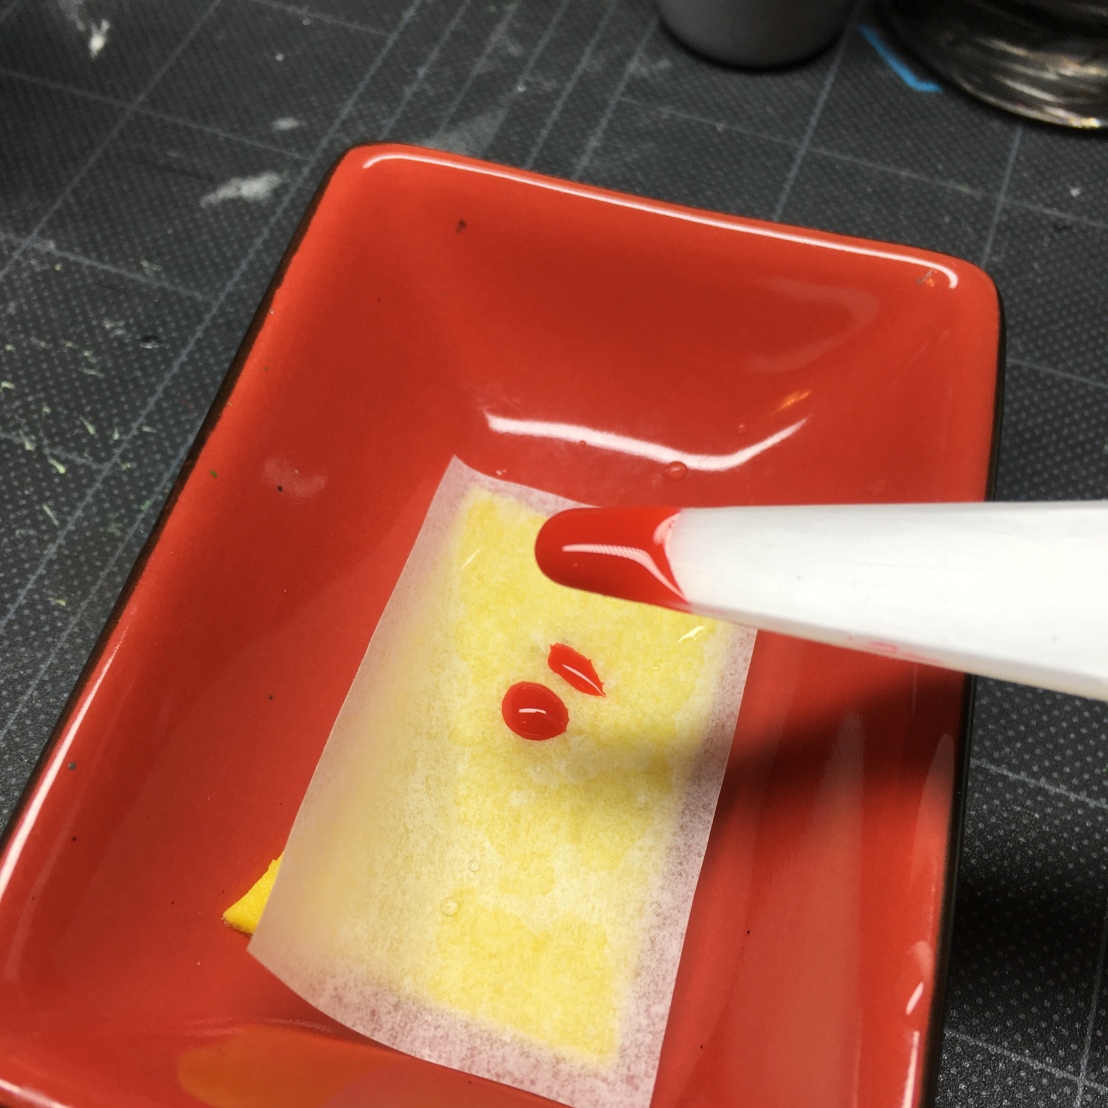
Oh, those technical paints don’t work as well being thinned or from a wet palette. I just go straight from the pot. As long as the brush is clean, it’s all good.
LikeLiked by 2 people
Bases look good as well. The scratching up does work well to cover any inconsistencies. Also enjoy your holiday and sorry about all the posts – a bit distracted here atm as this is right near me and even nearer my dad’s place.
https://twitter.com/search?q=%22West%20Footscray%22&src=tren&data_id=tweet%3A1034925201606074369
LikeLiked by 1 person
Holy crap, hope you are all ok?!
On the thinning….totally forgot to mention that. I ended up thinning the Spiritstone on the second try to get it into the crevices of the Waystone a bit easier. It made it much better to work with for that purpose. I think I just applied two coats and worked well enough. I’d be tempted to try again on the gems, but they are so small, probably not necessary. Thanks for the tip on the BFTBG, I just picked some up the other day, so that will be another experiment. Thanks man!
LikeLiked by 2 people
Yeah, luckily (for us) the wind took the smoke trails in a different direction. No luck for the poor bastards underneath it, though. 😦
So it’s being reported that the building was owned by the South Australian Hells Angels via an accountant that the ATO (our IRS) was investigating. Much of the smoke was also cause by acetone in the blaze, which is used to make Ice (Meth). Nothing to see here…
LikeLiked by 1 person
That’s terrible
LikeLiked by 1 person
Yep I’m with you I prefer the Skrag brown. More realistic. You’ve done well all round mate. Great stuff!!
LikeLiked by 2 people
Thanks IRO, appreciate it!
LikeLiked by 1 person
Hey, did you watch that music video? It’s by a Kiwi band, so I thought of you and Az. though I’ve heard Kiwi-land is far removed from Aussie-Land.
LikeLiked by 2 people
Yeah I’ve seen it before too 👍🏽👍🏽
LikeLiked by 2 people
A nice range of new trials here! And thanks for the reminder, I need to post my attempt at doing a marble effect.
I have one of the Vallejo Rust Washes, but I don’t like using it over metallics, because it doesn’t really dull down the shine of the metal at all, which makes for a weird effect. I do like it for doing streaking down from rivets or whatever, tho, where it’s over a non-metallic colour. Typhus Corrosion and then thinned down Skrag brown is my go-to for rust at the moment.
I second Azazel’s comments on the Spiritstone. A lot of the technicals actually need a fairly different approach from regular paints.
The base for your “eye”con dude looks good. Really brings him up a notch to not be just lying around on the table.
LikeLiked by 3 people
Thanks Alexis! Yea, I could see the light rust (more yellow) being great for a dripping sort of effect on walls. I still like the stain effect they both give, but I wouldn’t really call them “rust”.
LikeLiked by 2 people
Wow, you have been very busy. Now that you’ve tried out these new techniques do you think that they’ll become part of your regular painting repertoire, or will you go back to the ‘tried and true’ approaches?
For what it’s worth, I slightly prefer the new weathered bases over the old but I suspect that at tabletop range I would be hard-pressed to tell the difference at all.
LikeLiked by 3 people
Thanks, great question Argentbadger. Weathering bases, adding hazard stripes, and moot green glows, will be a part of my bases whenever it’s called for. I like to mix those up quite a bit, to add variety to the bases. I purposefully held off on finishing some of the Necromunda bases, just so I could attempt hazard stripes later. I also had the idea of trying out Toxic Goo back then, after seeing the video.
Spiritstone is the newest of the bunch, and even though I still find that paint kind of weird…there are a lot of interesting applications for it. I haven’t been 100% satisfied with using it for gems yet, but it’s something I plan to keep experimenting with.
No worries about the new/old preference. It’s always good to know. I took a look at both again, and I think what really worked with the new effect was the color variations that got built up with the two types of rust wash. I’ve also probably gotten a little better at application since my first try. With future bases, I think I would continue to use a mix of those, and also include some more rusted spots of typhus corrosion/ryza rust/thinned skrag brown, like I did with the Goliath bases.
All of that is adding quite a bit of complexity to the bases though and I started to notice on the last ones how time consuming the lot can be. That’s not a total deterrent for me, but just made me aware that I need to start those bases earlier, otherwise I will delay the actual mini even more. I tend to paint most everything up to to the highlights, before basing. At that point I really feel the pressure to base them, and I don’t want to stall out. So I’ll just incorporate some base work into my routine. Easy enough to throw a wash on a few bases at the end of night, and let everything dry for next time.
LikeLiked by 1 person
That is a lot of new things going on. I have to say I’m loving the hazard stripes. They are simple but so effective.
LikeLiked by 2 people
Thanks B2tH! Yea, I’m some ways it seems like a lot, but I also felt it was a month of just slacking. 😉
LikeLiked by 2 people
Nice work! Those bases in particular look great!
LikeLiked by 1 person
Thanks man!
LikeLike
Ok, nice effort and they look good. Some of the stuff I’m doing is similar to yours, but the weathering part on my ruined buildings will take me into September. Oh well, I do have some questions and requests for advice, and some advice for you on The gem technicals. First, I did get the Vallejo Mecha Color Rust and Rust wash, and Citadel Typhus Corrosion and Ryza Rust for my rusting efforts. I did not know Skrag brown was a Rust! Anyways, any advice on those for Rust use? Secondly, how did you do the hazard stripes? LEGO?
Lastly, as far as the gem technicals go, I’ve found that for the red, you need a brown first, then a gold, then use the technical thick and brush in one direction. Let it dry, but don’t thin it. If using the waystone green or soulstone blue, substitute silver or chrome under the technical. I use them a lot in my Retro Sci-fi stuff.
LikeLiked by 3 people
Thanks Mark, I’ll give your gemstone tricks a try. It’s going to be an ongoing experiment for sure.
Let’s see, for the hazard stripes, I followed the video in a previous post, from a German guy. Basically Averland Sunset, a wash, and then I tried to use a pencil and a lego as a ruler to mark out the lines. The LEGO turned out to be too wide though, so I ended up just using my first lines as a guide. Fill in with some black, do some weathering, voila.
For the rust color I used on the Goliaths, i thinned skrag Brown so it is really watery (better to go too thin). It looks pretty good on spots that have Typhus Corrosion already. Then applied some Ryza Rust over the top. Ryza can be really bright, but things must not have totally dried underneath as the Ryza seemed to absorb the darker colors.
The new mecha weathering i used straight out of the bottle. Just creating pools, applying over typhus corrosion and possibly agrax. Keeping the lighter colored rust wash to the edges
LikeLiked by 2 people
That’s a quick reply, hope that helps, and I’m happy to answer more later.
LikeLiked by 1 person
Much thanks Faust. I have a few doors in the ruined buildings I am doing and next up is a series of ruined sci-fi walls with blast damage, so I bought a bunch of rust products. Of course I still have my Polly-S “Rust” from 1983 or 1984. So I’ll be a-weathering for a while, and will be using your info. 🙂
LikeLiked by 2 people
Skrag brown isn’t specifically intended as a rust effect paint, but it’s perfect for the job, especially when thinned down. I very much prefer it for general use over the Vallejo Rust Wash I have or Ryza Rust.
LikeLiked by 2 people
Yea, would have to look at it again…but isn’t if often used for leather or maybe mud? But like you said, thinned way down, ends up a nice rust effect once dry. Would have never guessed from the way it looks normally.
LikeLiked by 1 person
I don’t know, I go on holiday and then you go all crazy! Great stuff and I like that you embraced the technical challenge. No turning back now, great things are expected going forward!
LikeLiked by 1 person
Not as crazy as IRO though! 😉
LikeLiked by 1 person